Windows Defender is an anti-virus solution that comes integrated into Windows 10 to protect your device and data against viruses, ransomware, spyware, and other security and privacy threats. In this Optimize Windows 10 for Gaming guide, we’ll walk you through the steps to temporary or permanently disable Windows Defender.
Despite the critical role played by Windows Defender to protect your computer from emerging threats, there are still several scenarios when you may want to disable Windows Defender. For example, when setting up a computer that won’t connect to the internet and no one will be allowed to connect peripherals. Or when performing certain tasks that Windows Defender may interfere with.
You may also want to turn off Windows Defender temporarily to enhance your gaming experience as this will significantly improve your computer`s performance and reduce overhead specially when playing resources-demanding games.
Do you know that our game booster Game Fire can automatically deactivate Windows Defender when playing games and can apply various system tweaks to help boost games performance and eliminate in-game lags.
Optimize Windows 10 games’ performance by turning off Windows Defender temporarily
If you want to turn off Windows Defender to improve your computer’s performance, it’s very recommended that you did this temporarily in order not to make your computer vulnerable to security threats.
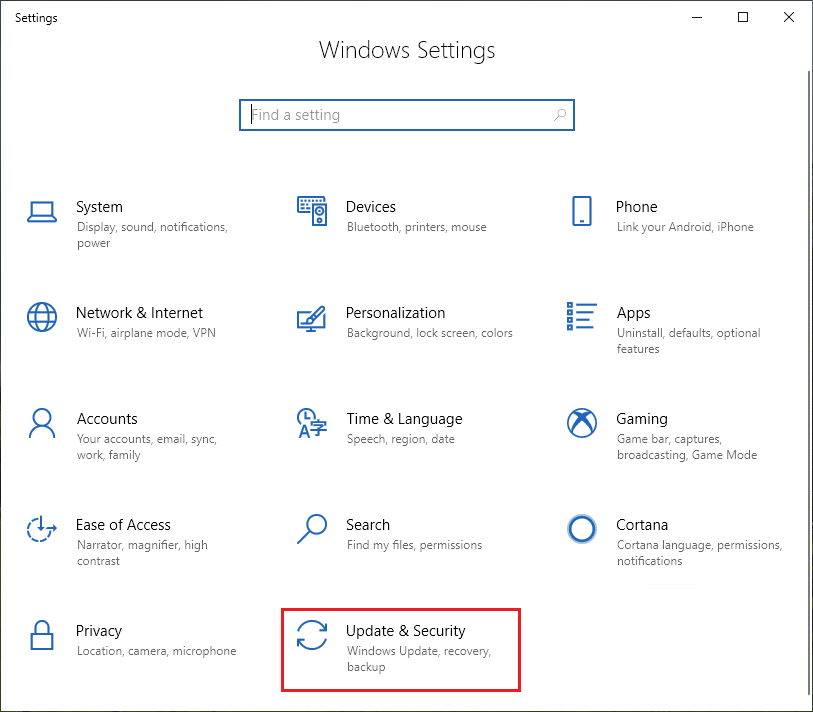
Step 1: Launch the Settings app by clicking Settings in the Start Menu and then click Update & Security.
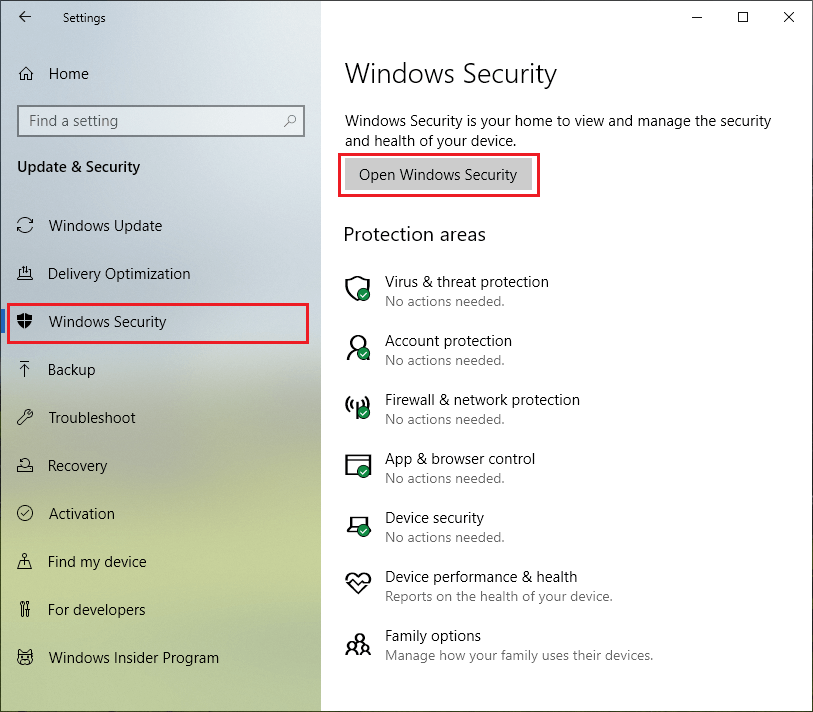
Step 2: Select Windows Security from the left pane, then click the Open Windows Security button.
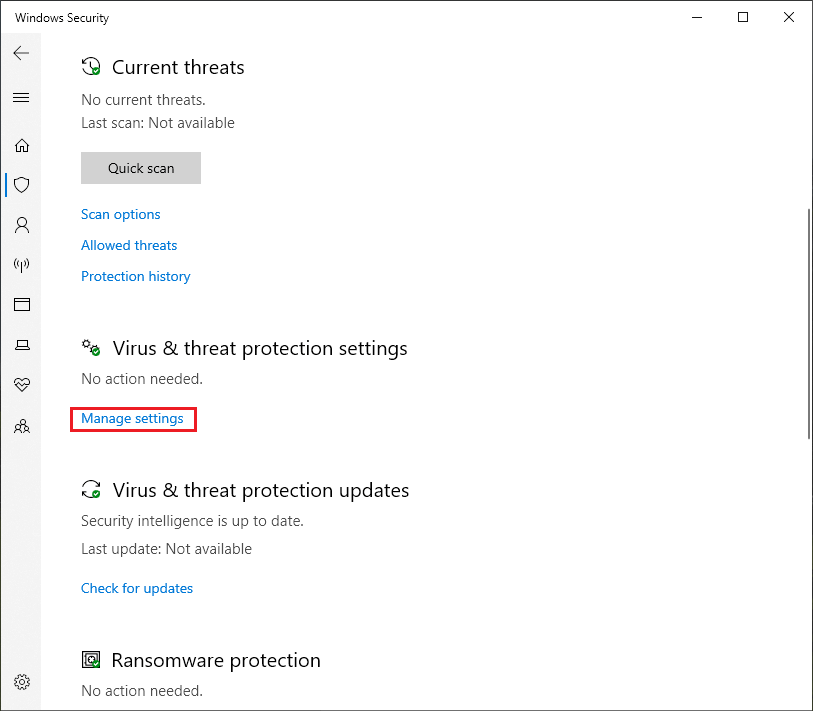
Step 3: In the Windows Security app, choose Virus & threat protection from the left pane, then under the Virus & threat protection settings click on Manage settings.
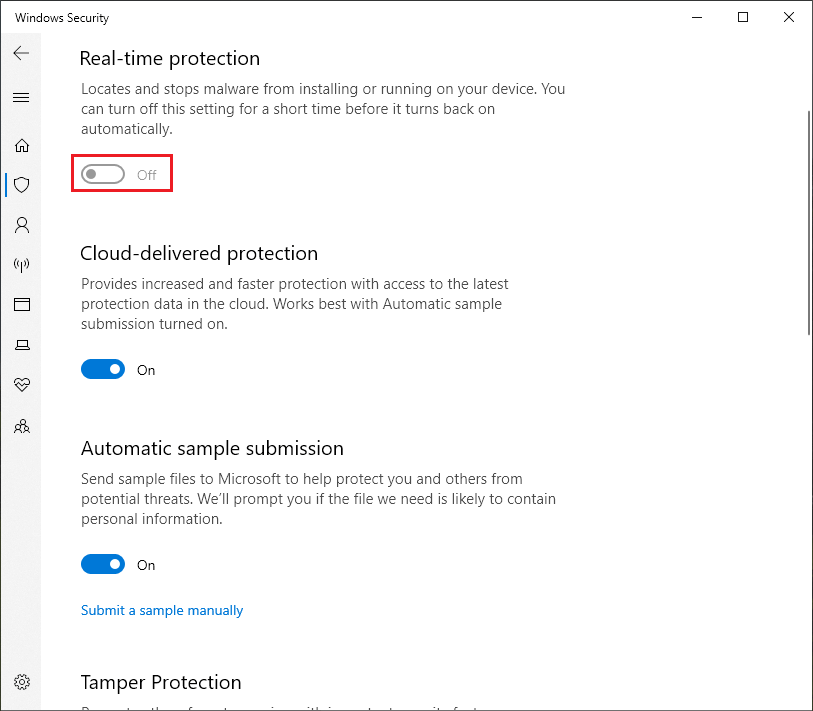
Step 4: Set the Real-Time protection option to Off to suspend Windows Defender temporarily.
Disabling the Real-time protection will deactivate Windows Defender temporarily for some time or until the next computer startup.
Permanently disable Windows Defender
DO NOT disable Windows Defender permanently unless you are using a third party security solution, as this will make your computer vulnerable to security threats.
Method 1: Turn off Windows Defender using Group Policy
If you’re running Windows 10 Pro, Enterprise, or Education, you can use the Local Group Policy Editor to permanently disable Windows Defender.
Step 1: Press Win + R to open the Run dialog box and type gpedit.msc then hit Enter or OK.
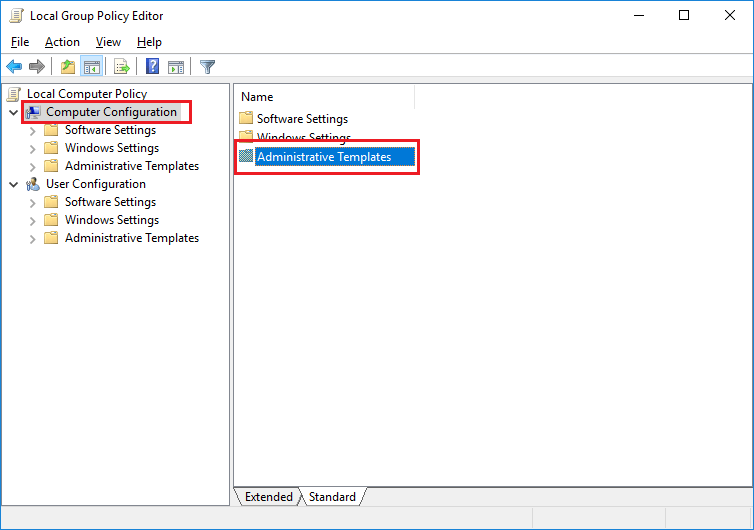
Step 2: Choose Computer Configuration from the left pane then click Administrative Templates.
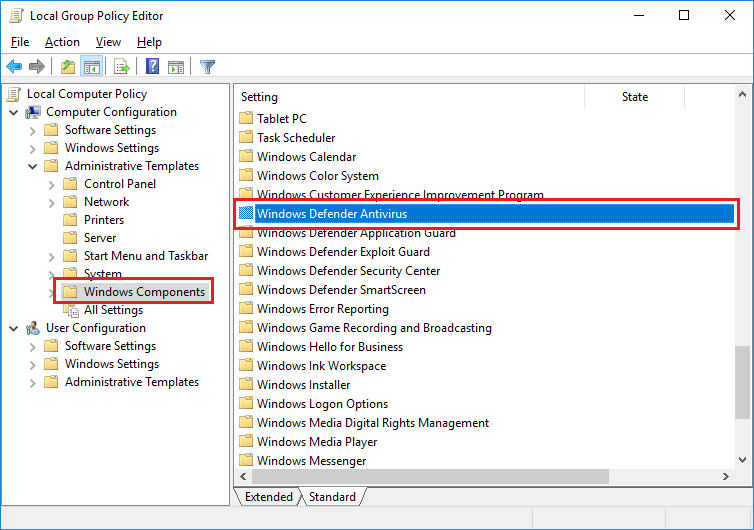
Step 3: Choose Windows Components then double click Windows Defender Antivirus.
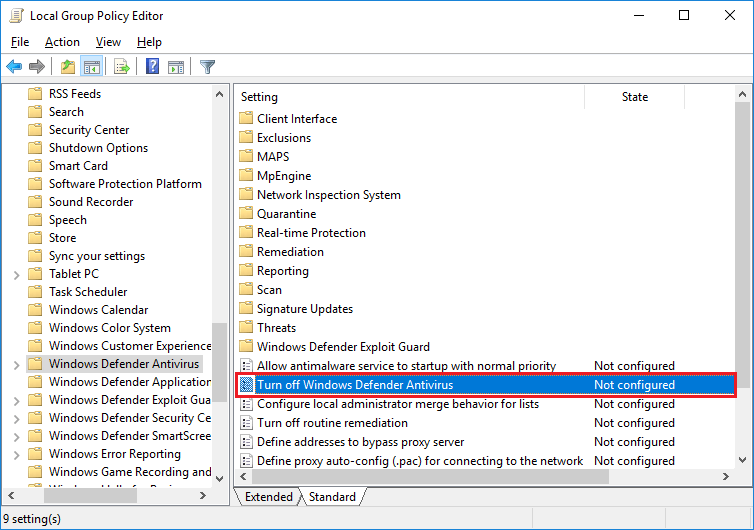
Step 4: Double click Turn off Windows Defender Antivirus.
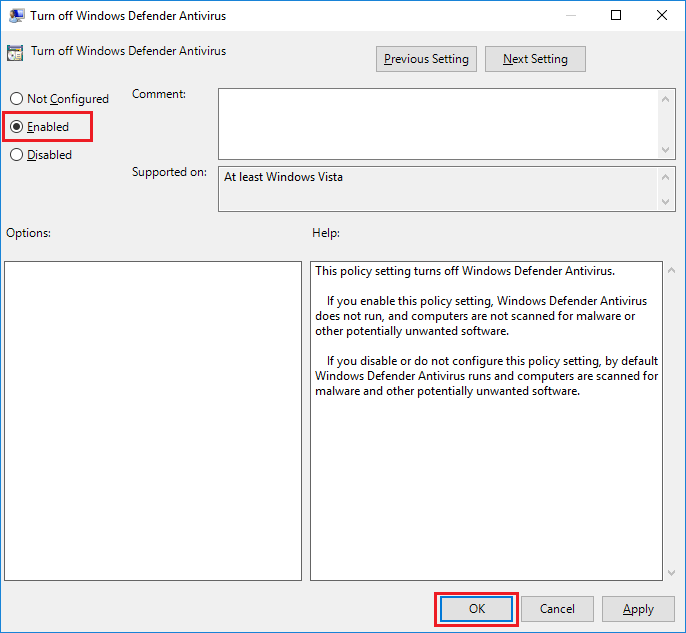
Step 5: Check the Enabled radio button then click OK.
Restart your computer to apply the new changes.
Method 2: Turn off Windows Defender using Windows Registry
Tamper Protection
You need to disable the Windows Defender Tamper Protection feature to be able to change Windows Defender settings using Windows Registry. Learn how to disable Tamper Protection
Step 1: Press Win + R to open the Run dialog box and type regedit then hit Enter or OK.

Step 2: Browse the following path: HKEY_LOCAL_MACHINE\SOFTWARE\Policies\Microsoft\Windows Defender
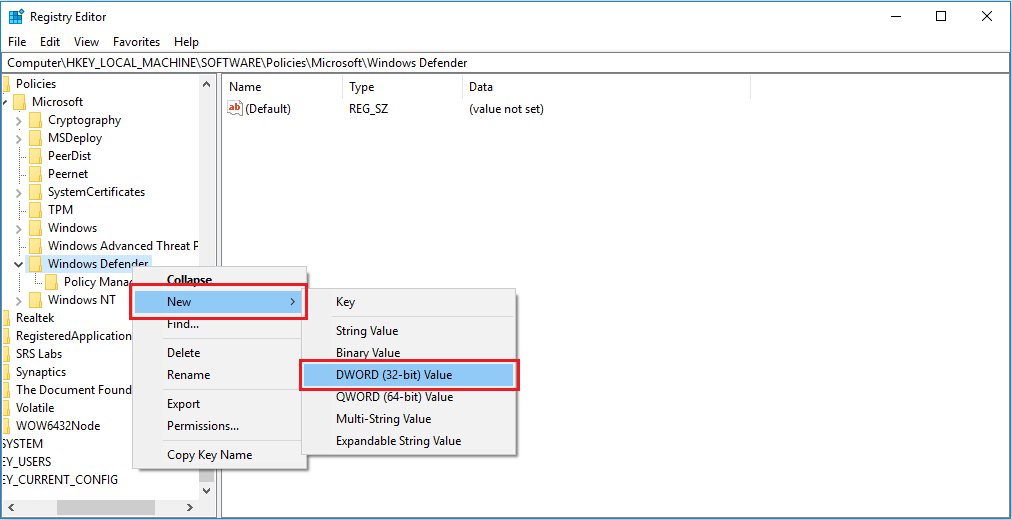
Step 3: If you don’t see the DisableAntiSpyware value then right-click the Windows Defender key, select New, and click on DWORD (32-bit) Value. Name the new value DisableAntiSpyware and press Enter.
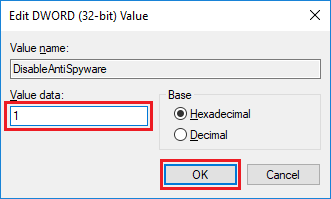
Step 4: Double-click DisableAntiSpyware and set the value from 0 to 1 then hit Enter or OK
Restart your computer to apply the new changes.


Leave a Reply Cancel reply